

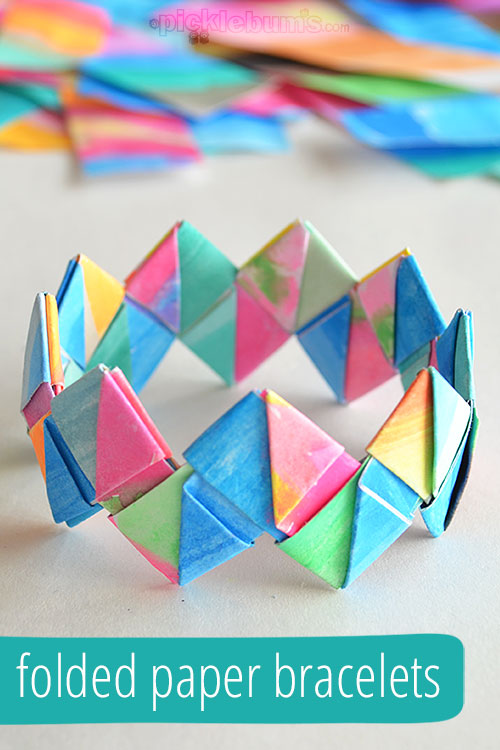
How to Make Folded Paper Bracelets
Making a folded paper bracelet is a fun way to keep the kids busy and to use up old paintings. Plus, they look so pretty!
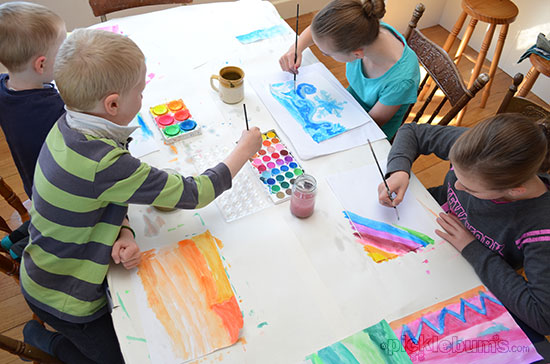
We love our watercolour paint sets. I mean, we really love them.
Check out our latest video…
Tips for a Calm Christmashttps://imasdk.googleapis.com/js/core/bridge3.426.0_en.html#goog_1566082815[Advertisement] Your video will begin shortly: 0:01
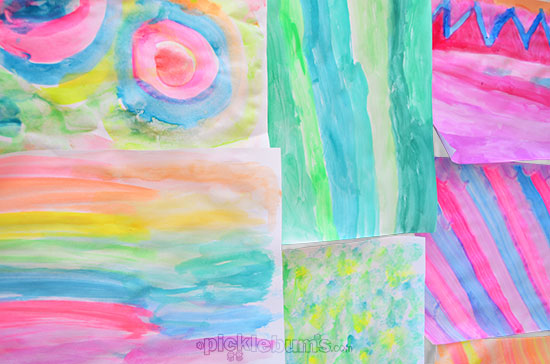
I don’t think a week ever goes by when someone doesn’t get out the watercolours for a little painting. One of the big kids got them out on the weekend, and before long all four kids were busy filling the paper with colour.
With so much painting, there is always a pile of finished artwork in my study and recently I remembered a fun way to use it. Cleaning out some paperwork I came across an ancient photocopied sheet of instructions for making folded paper bracelets. I remember making these as a teenager, and I knew my kids would love to transform their paintings into wearable art so we got out the pile of paintings got to work!
How to Make a Folded Paper Bracelet
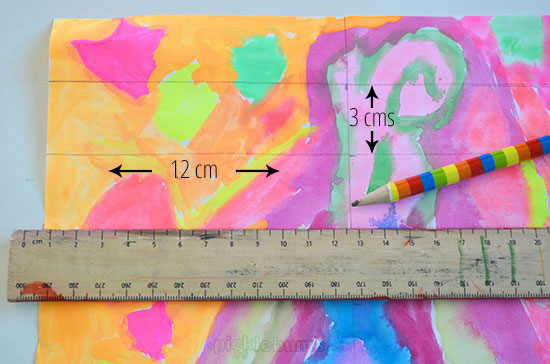
To make a folded paper bracelet you need 16-22 strips of paper. The strips of paper need to be 12cms x 3cms, bigger or smaller is fine, as long as the size ratio is 1:4.
We worked on our maths skills, counting by threes to rule up the paper and then I cut the strips with a paper cutter to making lots of strips quickly and easily.
For each bracelet you’ll need between 16 and 22 strips, depending on how big a bracelet you want to make. We used 18 strips to make one big enough to fit over my ten year old’s hand.
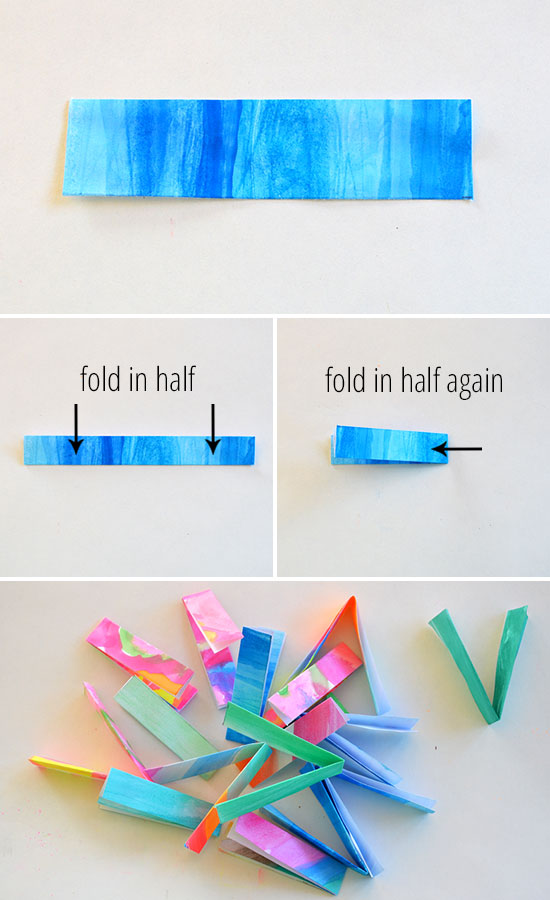
Now that you have your paper strips, follow the instructions below to fold them and construct the bracelet.
Begin by folding your strips into the basic shape, my six year old was good at this process.
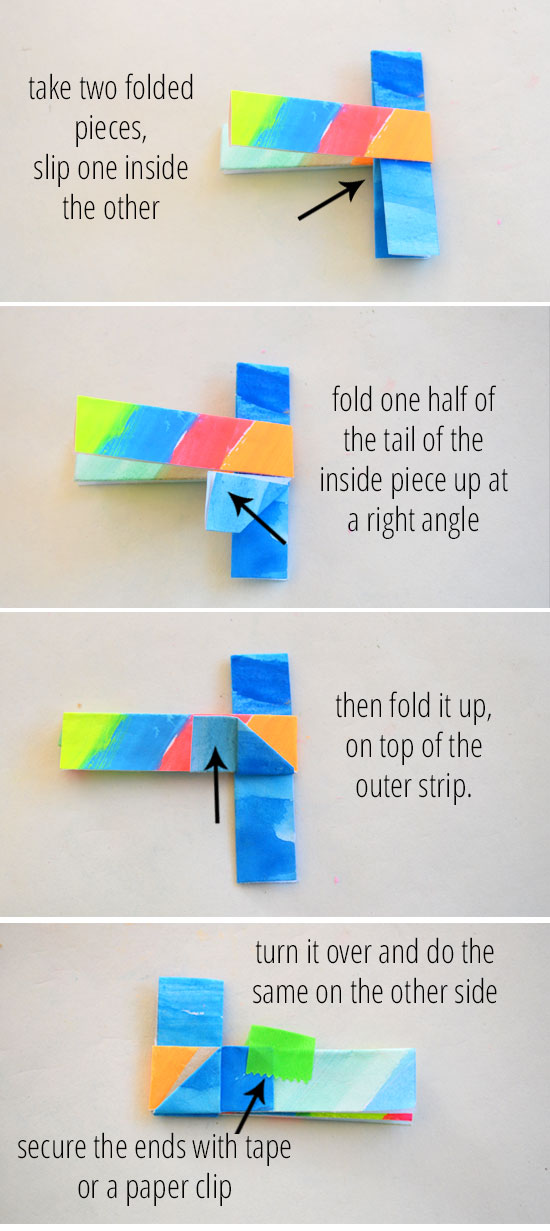
Now you need to learn the basic construction technique. This is a little tricky but with help and supervision my girls (aged ten) were able to master the process after some learning time.
Once you’ve got the hang of it, keep adding strips. I suggest making the loop part of each strip a little on the large size when working with kids, it will look a little less neat and symmetrical when finished but it makes it much easier for kids to insert the next strip.
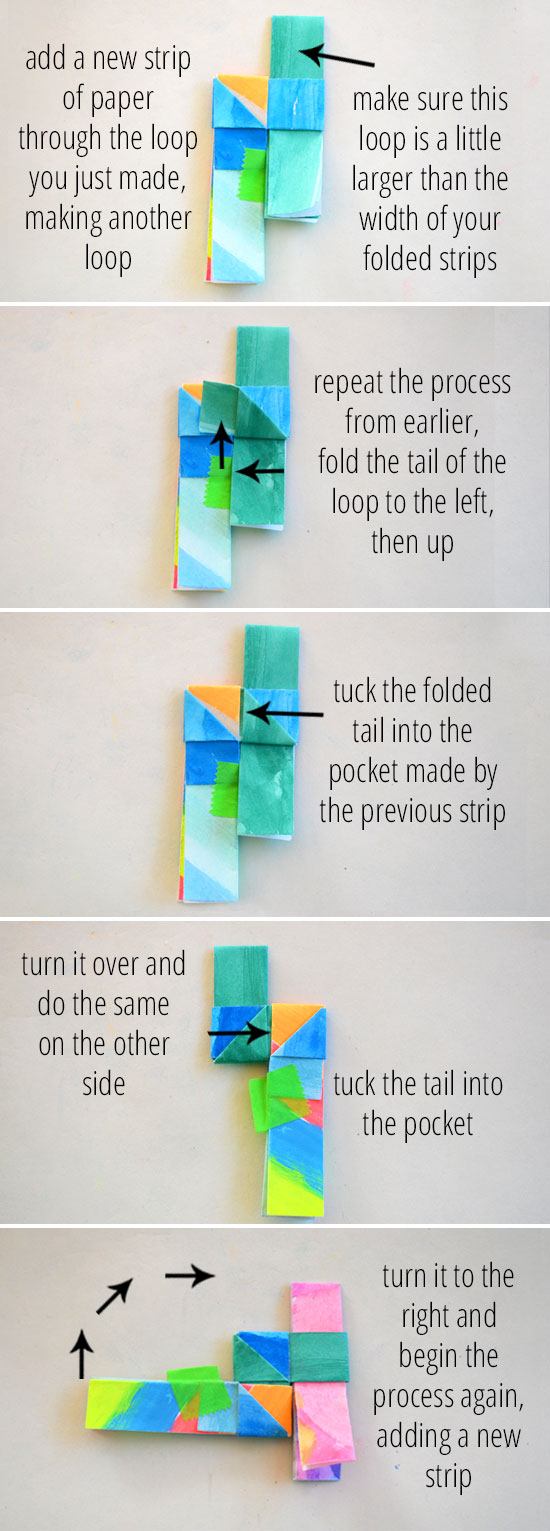
Keep adding strips…
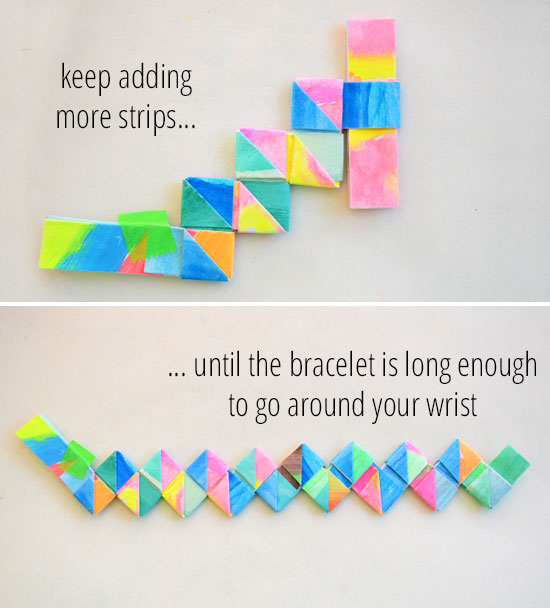
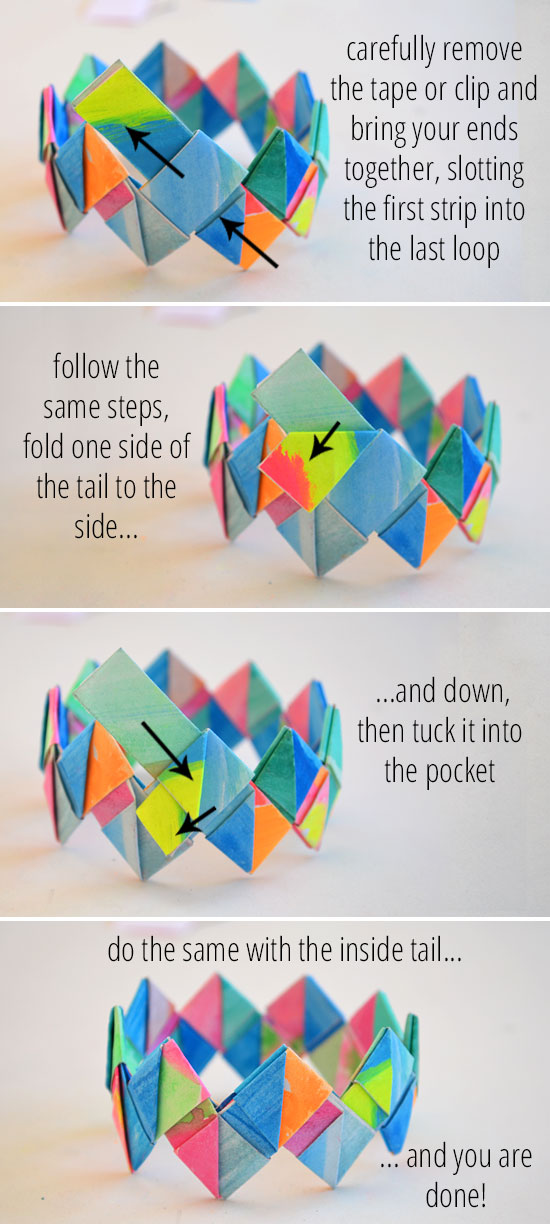
Eventually you will have a long enough chain to make a bracelet. Remember it needs to fit over your hand when it is done, so don’t make it too small!
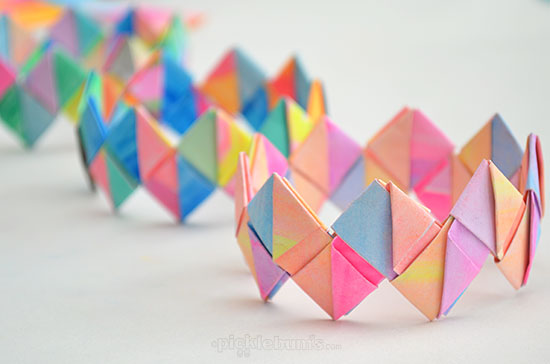
Our folded paper bracelets turned out even better than I remembered! The colours of the kid’s paintings looked fabulous all folded together.
They would make an unusual and one of a kind gift don’t you think!? Perfect for Mother’s Day or an activity at a tween party?
We are working on folding a really big one to make a crown!

What do you do with your kid’s artwork?
We used our favourite watercolour paints and water soluble crayons to make these paintings. My kids love watercolour paints because there are lots of colour options, and I love them because they are quick and easy to set up and not super messy. One of our all time favourite sets is the fluro tempera blocks, the colours are so awesome!